Constructing and installing a concrete retaining wall involves several steps and can vary in complexity depending on the size and design of the wall. Here’s a general step-by-step guide:
1. Planning and Preparation:
- Determine the purpose and design of the retaining wall, considering factors like height, drainage, soil conditions, and local regulations.
- Obtain necessary permits and permissions from local authorities if required.
- Gather tools and materials needed for the project, including concrete mix, rebar, form boards, gravel, drainage pipes, and compacting equipment.
2. Site Preparation:
- Mark the area where the retaining wall will be constructed using stakes and string. Excavate and clear the area, ensuring it is level and free from debris.
- If the wall will be load-bearing, ensure a stable foundation by compacting the soil and adding a layer of gravel.
3. Building the Formwork:
- Construct formwork using sturdy boards or panels to shape the concrete. The formwork should be the desired size and shape of the wall and properly secured in place.
4. Installing Reinforcement:
- Depending on the wall’s height and design, install rebar or reinforcement mesh inside the formwork. This strengthens the concrete and provides structural support.
5. Mixing and Pouring Concrete:
- Mix the concrete according to the manufacturer’s instructions. It should have the right consistency for pouring.
- Pour the concrete into the formwork in manageable sections, starting from one end and working towards the other. Use a shovel or concrete pump to fill the formwork evenly.
6. Smoothing and Leveling:
- After pouring each section, use a screed or a straight board to level the surface of the concrete. Ensure it is flat and at the desired height.
7. Finishing and Curing:
- Once the concrete is in place, use a trowel to smooth the surface and eliminate air pockets. Add any desired textures or finishes.
- Cover the freshly poured concrete with a curing compound or moist curing blankets to prevent rapid drying and ensure proper curing. Follow the curing time recommended by the concrete manufacturer.
8. Removing Formwork and Final Touches:
- Allow the concrete to cure according to the recommended time frame. Once cured, carefully remove the formwork.
- Check for any imperfections or areas that need touch-ups. Patch or repair as necessary.
9. Backfilling and Drainage:
- If required, backfill the area behind the wall with suitable material like gravel or soil. Install drainage pipes or weep holes to manage water buildup behind the wall and prevent pressure on the structure.
10. Landscaping and Maintenance:
- Finish landscaping around the retaining wall, adding vegetation or decorative elements if desired.
- Regularly inspect the retaining wall for any signs of damage or erosion and perform necessary maintenance to ensure its integrity.
It’s important to note that constructing a concrete retaining wall can be a complex and labor-intensive process. For larger or more intricate projects, it might be beneficial to consult or hire professionals experienced in such constructions to ensure safety and structural integrity. Additionally, always follow local building codes and regulations when undertaking any construction project.
Shannon is the Cox Concrete Retaining Wall Specialist. Shannon adheres to the Cox Concrete standard of excellence with each project.
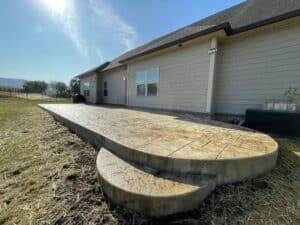
Our Clark Project included a double retaining wall, concrete stamped patio with antiquing and infinity seal, and steps leading down to the property’s boat dock. The Clark Family love their new concrete space and plan to enjoy entertaining and family time as the warmer seasons draw near.